How to Apply Eyeshadow Like a Pro

You’re flipping through magazines, watching a reality television stars interview, or the many beauty gurus on YouTube, and you’re thinking “they must all have a makeup artist” and a lot of the times they do, but many of them don’t. Hard to believe, but most of them began just like you and I, learning how to apply eyeshadow, getting to know which techniques gave them the best results and with practice and even more practice they finally got it just right.
There are a lot of ways on how to apply eyeshadow from swiping a wash of color onto your lids with your fingers for a quick eye makeup look, to the more detailed eye makeup looks that you may think took hours to create, but once you’ve perfected your own skills they can all be easily achieved. It’s a fun process and the keyword for anyone including the pros is “patience”. If you love wearing eye makeup then learning how to apply eyeshadow to achieve a simple, everyday eyeshadow look is necessary.
Once you have this down, you can begin building from there and making your eye makeup styles unique to fit your personality. By the time you’ve finished with this article, we’re confident that you’ll have the tools and tips you need for how to apply eyeshadow like a pro every time.
It all starts with the brush...
Make the investment. You’ll be happy that you did. Having good brushes is key to how to apply eyeshadow and creating eye makeup trends and styles that will look professional. You want your eye makeup to look seamless and by having the right brushes will enable you to do them with ease. Choosing them can be overwhelming since there are so many types and some do almost the exact same thing, but starting with the basics will definitely get you on the right track to creating your glamorous eyes and as you become more experienced with how to apply eyeshadow you can add more brushes to your set.
All Over Shader Brush: For applying color to the entire eye area for a wash of color, to the brow bone to highlight your eyes and accentuate your brows, and for blending or softening color that is too dark. The wide brush head allows you to apply color to the entire lid in just a few simple strokes.
Pro Crease Blender Brush: This brush is mostly known as the “dome” shaped brush because of its shape. Girls this brush is a must for anyone wishing to do a smokey eye look. It adds contour in the crease, acts as a blending tool, and can even be used underneath the eyes to smoke your liner. Every makeup artist will concur that this is an essential brush for any makeup kit and key for how to apply eyeshadow like a pro.
Flat or Dome Shaped Eyeliner Brush: Both of these brushes can be used for lining the eyes and for blending creams and gels when used as liner. Having an eyeliner brush that is synthetic (taklon), and one that is not (sable) is good to include in your basic brush set and also a must for how to apply eyeshadow like a pro.
If you’re just starting out you may want to consider purchasing a brush set for eyes so you’ll have all of your brushes at once. There are many that are affordable but the best way to decide is to visit a makeup counter, or a makeup chain like Ulta and see the brushes, feel the hairs, and how they feel on your eyes so you know what you’re buying before you purchase.
Prime, Prime, Prime
Priming your eyes before you put on eyeshadow allows the color to stay looking fresh on your eyelid, even when it becomes oily, and it shows its true pigment, it also allows for a smooth application. You want your eyeshadow to stand out. Apply your primer to your eyelid. You only need the tiniest amount, a little goes a long way. You can also use a concealer as a base before adding color but if your lids tend to be shiny a primer will be better. Once you’ve finished this step you’re ready for some eyeshadow!
Choose the right eyeshadow
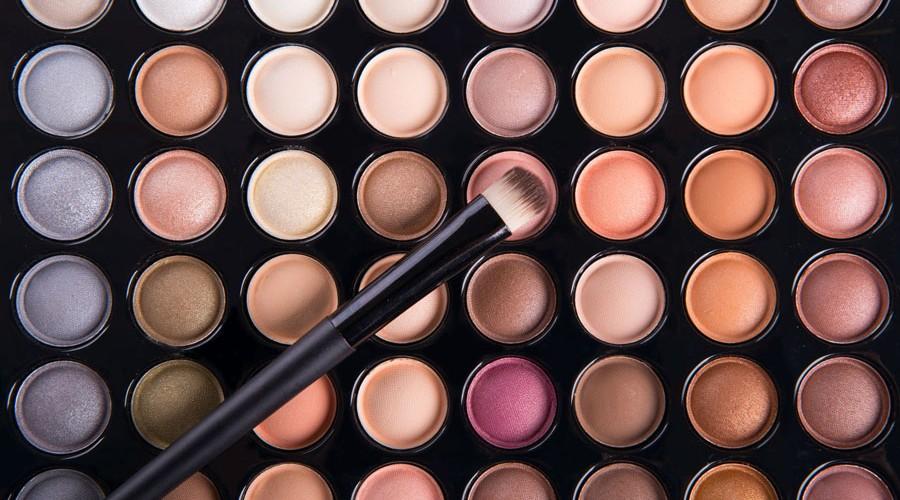
Choosing the right eyeshadows for yourself that will compliment your natural skin tone can definitely be a bit daunting since there are so many colors, finishes, and products to choose from. Pressed and loose, shimmer and metallic and of course the mattes are all good options. Worn together they can help you to do a dramatic smokey eye or even a trending eyeliner look. The best way to tackle this is to start with a few basic colors that work for you and also your eye color or perhaps an eyeshadow palette which will give you a combination of both neutral, dark, and shimmer/iridescent colors.
Find your desired look
Before you even begin your makeup, think about the look you would like to do. If you have a video bookmarked, or a picture you are re-creating, pull the products and brushes so you have everything you need ready. This will also save time too and leave less room for mistakes. If you’re going for a daytime look that is more casual a neutral liner and a soft color shadow on the lids may be perfect. For a more dramatic nighttime look pulling out the black liquid liner, gunmetal shimmer shadow and black mascara will not disappoint.
Colors and Color Combos
Colors play an important part in this look, of course. If you’re going for a bold, smokey eye, then you’ll want to use eyeshadows that are a darker hue like an onyx, eggplant, charcoal or dark brown in the crease and softer colors for the lids and brow bone to compliment them.
Depending on your look, pick up the eyeshadow that looks like it has the most pigment. The easiest way to see how much pigment you have to work with before applying to your eyes is to use your index or middle finger and swirl around the center of pot to pick up color. Next tap color onto the outside of your hand to see whether it’s sheer or more opaque. The two basic eye shadows are:
Matte: A flat eyeshadow free of any shimmer or metallic that is great for blending and highlighting the face and eyes.
Shimmer/Metallic: Both finishes will accentuate the eyes regardless of the color you choose. Shimmers are also great for blending and taking color down that is too dark. Combining a shimmer or metallic with a matte shadow is also a beautiful contrast when learning how to apply eyeshadow, especially when doing a smokey eye look.
Along with your color combinations, make sure to have the right color for accentuating your eyes underneath your brow bone as well as in the corner of eyes. This technique is most popular with smokey eyes as it gives them a more “open” and sultry look. Many of the pre-set eyeshadow palettes will come with a color for highlighting under the brows.
Application
Now that we have the basics out of the way, you are definitely ready for how to apply eyeshadow like a pro. You have your eyes primed, your brushes out, and your color combinations selected, so let’s do it!
Step 1:
Begin by applying a neutral shade in a softer hue to the eyelid using your All Over Eye Shader or a medium size eyeshadow brush. Make sure to press the color into the lid as you move across the eye to ensure an even application. Create intensity even when using a lighter shade by adding more layers of the same color.
Step 2:
Choose a lighter, shimmery shade and with your flat eyeliner brush add a thin line right along your lid using a patting motion to apply from corner to corner. You can repeat this step to add more shimmer or leave as is for a softer line.
Step 3:
This step is optional if you want to create a gradual fading look on your lids. To do, add a color on top of the previous color used in Step 1 that is a slightly darker than the lid color. Gently pat this on your lid starting at the outer corner and gradually fading the color towards the middle of eye making sure to blend so it’s seamless with the color underneath. Use your blending brush to smooth any hard lines.
Step 4:
Using your Pro Crease Blender Brush, add a darker color to the outer corner for contouring your crease. Start by adding a little color first and adding more if needed. It’s easier to build the color than to take it down if you’ve applied too much. Remember, patience is key when you’re just learning how to apply eyeshadow. Keep blending into your crease using the “windshield wiper” effect so there are no harsh lines. To create a continuous look you can sweep the same crease color along the lower lash line.
Step 5:
Now it’s time for your highlighter, with your flat brush choose the highlighter you wish to use and apply this directly underneath the brow bone in a patting motion again until you have the desired effect. This step is optional, but you can also add a sliver of the same highlighter to the inner corner of your eyes creating a sideways “v” shape. Think Sarah Jessica Parker from her SATC days.
With all of these steps under your beauty belt you’ve officially learned the basics for how to apply eyeshadow like a pro. You can finish with a coat of your favorite black or dark brown mascara and some eyeliner along the top lids. There are numerous ways for how to apply eyeshadow and now that you have the know-how for achieving them, the looks you can create are endless. You can wet your brush and pack on a little shimmer, use bold colors in the summer and put on a fun summer outfit, or add glitter to your lids with a little lash glue. It’s all about having fun and finding out what works for you. And remember, take your time and don’t rub your eyes.